Cast iron - a classic in the art of cooking. For centuries, chefs have appreciated the unique property of this material to store heat and distribute it evenly. Whether in a Dutch oven or a frying pan, vegetarian dishes are particularly aromatic on cast iron. Be inspired by our recipes and discover the diversity of plant-based cooking over an open fire.
Potato rösti
Grilled camembert
Mushroom pan
Mediterranean grilled vegetables
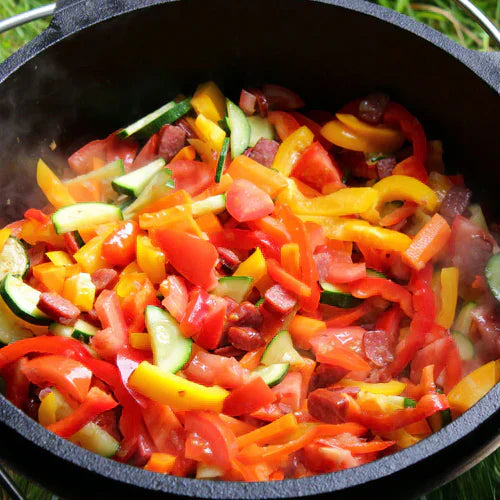
Colorful fire pot
Chicago-style pizza
Tips for the preparation of vegetarian dishes in the Dutch Oven
Get started now with the Dutch Oven from Petromax
Vegetarian Dutch Oven dishes - our recommendations
Plant-based and delicious: Discover the variety of vegetarian cuisine in the Dutch Oven Sustainable enjoyment has never been so easy! In the following recipes, we show you how to conjure up unforgettable meals with just a few ingredients and lots of flavor.

Potato rösti
Let's start our culinary journey with a classic: potato rösti. This simple but delicious dish takes on a very special touch in the Dutch oven. Crispy on the outside, tender on the inside and full of flavor - potato rösti is the highlight of every meal. Whether as a hearty side dish or as a main course with a fresh salad, this recipe is versatile and quick to prepare.
Ingredients:
- 800 g potatoes
- 1 egg
- 1 tbsp cornflour
- 1 tsp caraway seeds
- 1 tsp sea salt
- ½ tsp pepper
- Clarified butter for frying
Preparation:
- Prepare the potatoes: Peel and finely grate the potatoes. Press the excess water into a bowl with a clean cloth.
- Drain off the starch: Leave the collected water to stand for 5 minutes and then carefully tip it out until only the settled starch remains in the bowl.
- Prepare the dough: Add the grated potatoes, egg, cornflour, caraway seeds, salt and a little pepper to the settled starch and mix well.
- Fry: Heat clarified butter in a wrought-iron pan and place patties about 2 cm high in the pan. Fry for 5-6 minutes, turn carefully and fry for a further 5 minutes until golden brown.
- Serve: Serve the finished potato rösti with roasted vegetables or meat.
Click here for the original recipe!

Grilled camembert
Who says barbecuing is only for meat lovers? With our recipe for grilled camembert, you can conjure up a delicious vegetarian alternative on the barbecue in no time at all. The creamy cheese, refined with an aromatic herb marinade, is the perfect snack for cozy barbecue evenings.
Ingredients:
- 2 Camembert cheeses (medium)
- 4 tbsp olive oil
- 1 tsp Dijon mustard
- 3 tbsp garden herbs (fresh, chopped)
- 1/2 bell bell pepper (red), diced
- toothpick
Preparation:
- Prepare the cheese: Prick the surface of the Camembert several times with a toothpick without piercing it.
- Prepare the marinade: Mix the olive oil, Dijon mustard and herbs to create an aromatic marinade.
- Topping: Brush the tops of the camemberts generously with the marinade and spread the diced peppers on top.
- Tip: For an even more intense flavor, leave the camemberts to marinate overnight.
- Grill: Place the camemberts in the grill fire pan and grill for about 15 minutes until they are soft and lightly browned.
- Serve: Serve the grilled camembert immediately with baguette or crusty bread.
Click here for the original recipe!

Mushroom pan
Bring the taste of the fair straight to your plate! With our simple mushroom pan, you can conjure up a hearty dish in no time at all that is guaranteed to please everyone. The combination of aromatic mushrooms, tender onions and a creamy garlic sauce is simply irresistible.
Ingredients:
- 500 g mushrooms
- 2 onions (large)
- paprika powder, salt, pepper
- 150 g creamy processed cheese
- 50 g processed herb cheese
- 100 ml milk
- 2 cloves of garlic
Preparation:
- Prepare the mushrooms and onions: Clean and slice the mushrooms. Peel the onions and cut into rings.
- Sauté: Sauté the onions in the hot fire bowl until they are translucent. Then add the mushrooms and fry everything together until the mushrooms are soft. Season with paprika powder, salt and pepper.
- Prepare the sauce: While the mushrooms are frying, mix the creamy processed cheese, processed herb cheese and milk in a separate bowl until smooth. Crush the garlic and mix in.
- Combine: Add the cheese and garlic sauce to the mushroom pan and mix everything well until the cheese has melted.
- Serve: Serve the finished mushroom pan hot.
Click here for the original recipe!

Mediterranean grilled vegetables
The Petromax Potato Roaster is basically nothing more than a Dutch Oven with an alternative shape. Turn your potato roaster into a Mediterranean oven and conjure up delicious grilled vegetables that taste like summer! The combination of different vegetables, aromatic herbs and the unique taste of the cast iron makes for an unforgettable taste experience.
Ingredients:
- 1 eggplant
- 1-2 zucchinis
- 3-4 large carrots
- 1 garlic bulb
- 3-4 onions
- 2 sprigs of fresh thyme
- 2 sprigs of fresh rosemary
- Sage to taste
- olive oil
- Coarse sea salt
Preparation:
- Prepare the vegetables: Wash the vegetables thoroughly and cut them into larger pieces as desired. You can halve the garlic bulb or leave it whole.
- Layer in the roasting pan: Place the vegetables in the potato roaster. Place firm vegetables such as carrots at the bottom and the eggplant on top. Place the sprigs of herbs and garlic in between.
- Seasoning: Drizzle the vegetables generously with olive oil and sprinkle with coarse sea salt.
- Grill: Close the lid of the potato roaster tightly and place it in the hot embers. For additional top heat, you can place 5-7 coals on the lid.
- Leave to cook: Allow the vegetables to cook for about 45 minutes. The exact cooking time may vary depending on the size of the vegetables and the heat of the embers.
- Serve: Carefully open the lid with the lid lifter and remove the vegetables. You can cut off any black spots. Serve the vegetables warm with fresh bread or as a side dish with meat or fish.
Click here for the original recipe!

Colorful fire pot
This colorful fire pot is not only an eye-catcher, but also a real taste explosion! With just a few ingredients and little effort, you can conjure up a hearty and healthy dish in the Dutch oven that tastes great both hot and cold. Perfect for a cozy get-together or as a souvenir for a picnic.
Ingredients:
- 2 onions (medium size)
- 2 zucchinis
- 4 carrots
- 2 peppers (red and yellow)
- 2 tomatoes
- 4 Landjäger (alternatively: cabanossi)
- salt and pepper
- 2 tbsp olive oil
- Optional: 1 tin of kidney beans, 1 tin of sweetcorn
Preparation:
- Preparation: Cut all the ingredients into large pieces.
- Fry: Heat the olive oil in the Dutch Oven and fry the onions and Landjäger until lightly browned.
- Add the vegetables: Add the rest of the vegetables and fry everything briefly.
- Season and cook: Season the stew with salt and pepper to taste. Optionally, add a can of kidney beans and a can of corn. Add enough water to just cover the vegetables. Close the lid and simmer over a medium heat for about 30-40 minutes until the vegetables are soft.
- Serve: Serve the colorful firepot hot with fresh bread or as a side dish with rice.
Click here for the original recipe!

Chicago-style pizza
Immerse yourself in the world of American pizza culture with this delicious Chicago-style pizza. The thick base, the stuffed cheese crust and the lavish toppings make this pizza a real taste sensation. Prepared in your Petromax Fire Skillet, it will be a highlight at any barbecue party.
Ingredients:
-
For the dough:
- 500g type 405 flour
- 220ml lukewarm water
- 1/2 cube yeast
- 1.5 tsp salt
- 30ml olive oil
- 1 egg
- 150g cheddar cubes
-
For the sauce:
- 400g chopped tomatoes
- 1 small onion
- 2 cloves garlic
- 1 tbsp olive oil
- 1 tsp oregano
- 1 tsp basil
- salt, pepper
-
For the topping:
- Mushrooms
- peppers
- onion
- 150g pizza cheese
Preparation:
-
Prepare the dough:
- Dissolve the yeast in lukewarm water.
- Knead the flour, salt, olive oil and yeast water into a smooth dough.
- Cover and leave to rise in a warm place for approx. 1 hour.
-
Prepare the sauce:
- Finely chop the onion and garlic.
- Sauté in olive oil.
- Add the chopped tomatoes, herbs, salt and pepper.
- Simmer for approx. 15 minutes.
-
Prepare the topping:
- Wash the vegetables and cut into bite-sized pieces.
-
Shape the pizza:
- Knead the dough again and roll out on a floured surface.
- Grease a cast iron pan with olive oil.
- Place the dough in the pan and press over the edge.
- Brush the edges with egg and press in the cheddar cubes.
- Fold the edges inwards and press down firmly.
-
Topping:
- Spread the pizza sauce on the base.
- Top with pizza cheese and vegetables.
-
Bake:
- Bake the pizza at 220°C indirect heat for approx. 30 minutes until the dough is golden brown and the cheese has melted.
Click here for the original recipe!
Tips for preparing vegetarian dishes in the Dutch Oven
The Dutch Oven is not only an indispensable companion for meat lovers. Vegetarians and vegans can also prepare delicious and healthy dishes with this versatile cookware. With a few simple tips and tricks, you can get the best out of your Dutch Oven and conjure up a culinary masterpiece every time.
The right technique for perfect results
To get the best out of your Dutch Oven, a few basic tips are helpful:
- Dose the heat correctly: The number of briquettes depends on the size of your Dutch Oven, the outside temperature and the desired degree of doneness. Indirect heat is particularly suitable for many vegetarian dishes, as the vegetables are cooked more gently and do not burn as quickly.
- The right base: Make sure that the base on which you place the hot Dutch oven is heat-resistant. A special base for Dutch ovens or a large grill rack are ideal.
- Use versatility: The Dutch Oven is a true all-rounder. In addition to classic cooking on the grill, you can also use it on the stove or even in the oven. The lid can even be used as a pan to sauté vegetables or reduce sauces.
The best vegetables for the Dutch Oven
Many types of vegetables are ideal for cooking in the Dutch Oven. They are particularly popular:
- Root vegetables: potatoes, carrots, sweet potatoes - they give your dishes a hearty flavor.
- Pumpkin plants: Pumpkin, zucchini, eggplant - these vegetables are not only delicious, but also very versatile.
- Onions and garlic: They form the basis for many dishes and provide an intense aroma.
- Beans and lentils: these pulses make your dishes filling and rich in protein.
Aromatic spice blends
With the right spices, you can give your vegetarian dishes a special touch. Here are some popular combinations:
- Mediterranean: rosemary, thyme, oregano, garlic
- Asian: ginger, turmeric, chili, coriander
- Indian: curry powder, cumin, coriander, garam masala
- Mexican: chili, coriander, cumin, paprika
Cleaning and care
Proper care of your Dutch oven is crucial to ensure that it serves you faithfully for many years to come. Cast iron is a natural product and develops a natural patina over time, which prevents food from sticking and enhances the taste.
-
Immediately after use:
- Leave to cool: Allow the Dutch Oven to cool down completely first. A change in temperature can lead to cracks.
- Warm water and brush: Clean the pot with warm water and a soft brush. Avoid detergent as it can damage the natural patina.
- Stubborn stains: For stubborn residues, you can use a little coarse salt. Rub the affected areas carefully with the salt and then rinse thoroughly.
-
Burn-in:
- Why bake? Baking seals the pores of the cast iron and forms a natural non-stick coating.
- How to sear? After cleaning, rub the Dutch Oven dry with kitchen paper and apply a thin layer of cooking oil (e.g. rapeseed oil). Then heat in the oven at a low temperature (approx. 180°C) for about an hour.
-
Store:
- Store in a dry place: Store the Dutch Oven in a dry place. A light film of oil protects it from rust.
- Do not wrap: Avoid wrapping the Dutch Oven in plastic or aluminum foil, as this can lead to moisture.
There are no limits to your vegetarian creativity with the Dutch Oven. Experiment with different vegetables, spices and cooking methods and discover the many possibilities of this versatile cookware.
Get started now with the Dutch Oven from Petromax
Are you in the mood for unforgettable taste experiences and want to take your cooking skills outdoors or in your kitchen to a new level with our vegetarian dishes? Then Petromax products are just right for you!

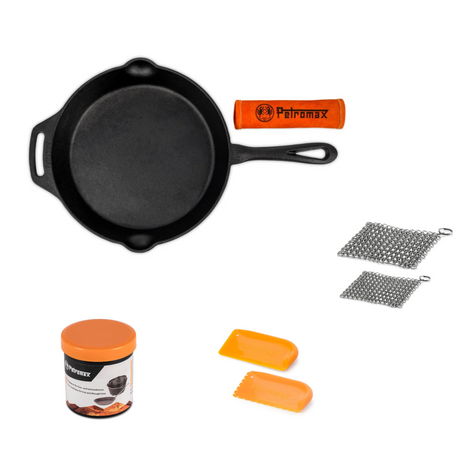
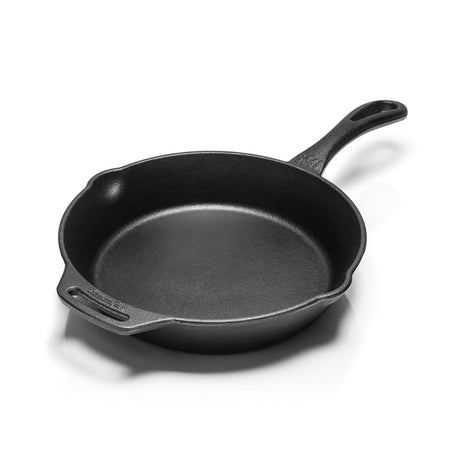
The Petromax Fire Skillet - your versatile companion
The Petromax Fire Skillet is more than just a skillet. It is a versatile tool for all those who like to cook and value quality and durability.
- High-quality cast iron: The excellent heat distribution and the natural non-stick effect make the Fire Skillet an indispensable companion in every kitchen.
- Versatility: Whether on the stove, in the oven or over an open fire - the fire pan can be used anywhere.
- Robust and durable: Thanks to the high-quality workmanship, the fire pan is extremely robust and can withstand intensive use.
- Different sizes: The right size for every need: The fire pan is available in six different sizes.
Discover the Fire Skillet here!

The Petromax Dutch Oven - For unforgettable outdoor cooking experiences
The Petromax Dutch Oven is a true classic among outdoor cooking utensils. You can use it to conjure up delicious stews, breads, casseroles and much more.
- Versatile application possibilities: Whether at the campfire, on the barbecue or in the oven - the Dutch Oven is extremely versatile.
- Natural non-stick effect: Thanks to the pre-treated surface, nothing sticks.
- Even heat distribution: The thick cast iron wall ensures optimum heat distribution and gentle cooking.
- Lid as a pan: The lid can be used as an additional cooking surface.


