
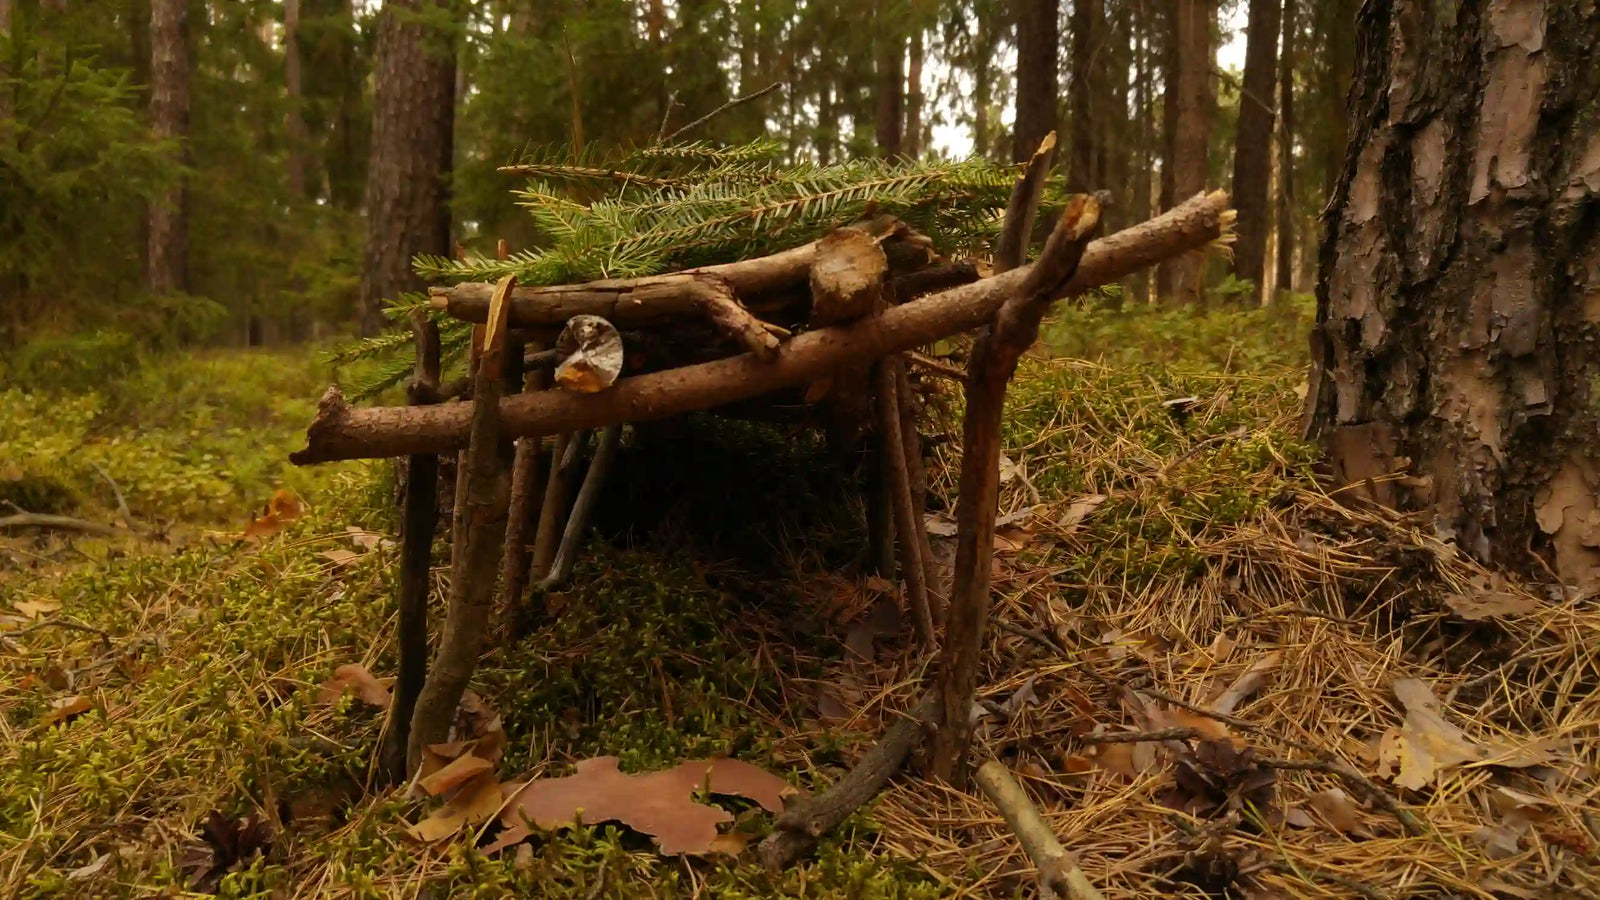
Imagine you’re outside – somewhere deep in the forest, far from civilization. The sun is slowly dipping toward the horizon, the wind is getting colder, maybe rain is even on the way. One thing becomes clear: without a safe, dry, and reasonably warm shelter, you’ve got a real problem. That’s exactly where the Bushcraft Shelter comes in.
A good shelter can make all the difference – between comfort and catastrophe, between sleeping through the night and shivering, between Adventure and real danger. Let’s take a look together at how you can build a sturdy, weatherproof shelter using natural materials and a bit of know-how.
Table of Contents
Why is a Bushcraft Shelter vital for survival in the wilderness?
How to choose the perfect location for a Bushcraft Shelter?
Which natural materials are suitable for building a Bushcraft Shelter?
How to build a weatherproof Bushcraft Shelter?
Which tools and ropes do you need for shelter building?
How to properly insulate and heat a Bushcraft Shelter?
Summary of key points
Why is a Bushcraft Shelter vital for survival in the wilderness?
In a true survival situation, one thing matters most: protection from the elements. The body loses heat rapidly in wind, wetness, and cold. A simple shelter helps you retain this precious body heat. If you can protect yourself from rain, snow, or cold wind, you’re already halfway there.
But it’s about more than just temperature. A solid shelter gives you security – mentally as well. Knowing you have a place to retreat strengthens your mind. And that can be crucial in an emergency. Plus, a shelter also protects you from curious or dangerous wildlife. Not an impenetrable armor, of course – but a signal: “Someone lives here, this is not free game.”

How to choose the perfect location for a Bushcraft Shelter?
Before you start, take a good look around. The location is crucial – a wrong spot can ruin your entire shelter project.
Ideally, pick a wind-sheltered spot with good natural protection, like trees or rock walls. Make sure your shelter is not in a hollow where rainwater collects, and not directly on a slope that could slide during heavy rain.
Keep an eye out for natural aids – for example, a forked branch where you can lay a supporting crossbeam. Rock ledges or thick tree trunks also make practical anchor points.
And don’t forget the safety aspects: dead branches above you can be dangerous in the wind, as can loose stones on slopes. Proximity to water is useful – but please not right at the riverbed.
Tip: Check out the microclimate – how does the light fall, how does the wind blow, what’s the soil like? All this affects how comfortable you’ll feel in your shelter.

Which natural materials are suitable for building a Bushcraft Shelter?
You don’t need a hardware store in your backpack – nature gives you everything you need. The key is learning to use materials wisely.
Branches are your number one building material. The straighter and sturdier, the better. Collect deadwood – it’s sustainable and often already dry and light. Thicker branches work well for the structure, finer twigs for covering.
Next comes insulation. Moss, grass, and bark are worth their weight in gold. They insulate, seal, and keep you warm. They also work great for stuffing gaps or as ground insulation.
No rope with you? No problem. Flexible twigs or thin strips of bark can be used like cord to hold your construction together. Not quite as strong as paracord – but perfectly fine for shelter building.
Also watch the availability: Does it make sense to build here? Is there enough material? Or do you have to haul everything in? Sustainability here isn’t eco-fluff, but plain practical thinking.

How to build a weatherproof Bushcraft Shelter?
Okay, now for the nitty-gritty. You’ve got the perfect spot and enough material? Then let’s get building. A weatherproof shelter follows proven principles you can apply step by step. With this guide, you’ll have a roof over your head that stands up to heavy rain.
Step 1: Build the frame
Find a straight, sturdy branch about 3-4 meters long. This will be your main support. Lean it against a tree, a rock, or a self-made forked branch. The angle should be about 45 degrees – steeper inside gets too tight, flatter won’t drain rainwater properly.
Step 2: Optimize roof pitch
The 45-degree rule is your best friend when building a shelter. This angle ensures optimal water runoff and protects against rain. You can easily measure it with your outstretched arm. In heavy rain, it can be even steeper.
Step 3: Build side walls
Now add the side supports. Lean more branches closely together against the main support. The closer the spacing, the sturdier the whole thing. The branches should stand firmly on the ground and reach up to the main support.
Step 4: Layer for waterproofing
Here’s where the real art begins. Work from bottom to top and lay your materials like roof tiles. Each new layer overlaps the one below by about a third. This safely channels rainwater away instead of letting it drip through. For real protection, you need layers at least 30-60 centimeters thick.
Step 5: Ensure stability
Wind is the enemy of every shelter. Weigh down your roof with heavy branches or stones. Check all connections and reinforce weak spots. A wobbly shelter is useless in a storm.
Step 6: Perfect the sealing
The finishing touch decides between waterproof or dripping wet. Make sure no branches stick out of the roof – water will definitely collect there. With careful layering, your shelter will stay dry even in heavy rain.

Which tools and ropes do you need for shelter building?
With a good bushcraft knife or a small saw, everything is easier. An axe is also helpful but not essential. If you have no equipment, you can improvise in a pinch – for example, with sharp-edged stones or broken branches as levers.
What you almost always need: cord or ropes. Ideally, you have paracord – light, sturdy, extremely versatile. If not, turn to nature: flexible twigs or bark strips work well for tying or fixing.
And yes, some knot skills never hurt. The simple square knot, clove hitch, or bowline are enough to build a stable shelter.

How to properly insulate and heat a Bushcraft Shelter?
Proper insulation and heating turn your shelter from a simple refuge into a life-saving haven. But a shelter only helps if you don’t freeze inside it. So: insulation is a must.
1. Ground insulation
Lay a thick layer of grass, moss, bark, or dry leaves under you. Sleeping directly on cold ground is a quick way to hypothermia.
2. Insulate walls
The more layers, the better. Moss, bark, twigs – build like a badger: all layered, tightly packed, insulating.
3. Heat source
If you can make a fire – do it. But carefully. The distance to the shelter must be large enough that nothing catches fire, but close enough that you feel the warmth. Here’s a great guide on making fire without a lighter.
4. Use body heat
Build your shelter as small as necessary, but big enough to lie comfortably inside. The tighter the space, the better your body heat stays inside.

Summary of key points
Building a Bushcraft Shelter isn’t rocket science – but it requires planning, attention, and a bit of practice. Once you master the basics, you can create a safe retreat anywhere in the wilderness.
So: get out there, give it a try, build your first shelter – and discover how much fun it is to work with nature instead of against it.


